Monthly Archives: January 2013

Revamping your lampy

revamping your lampy

spray_paint_lamp

So, if you’ve ever worked on a DIY project then you know sometimes projects go your way and other times things go astray. On this DIY project, a few things went astray but the good news is, I’ve learned a few tips I plan to share with you!

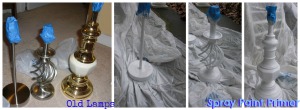
Over the Christmas holiday, I decided to revamp some lamps in my bedroom at home. My mom had mentioned buying new lamps, but I wanted to give a crack at giving these old lamps a new look.

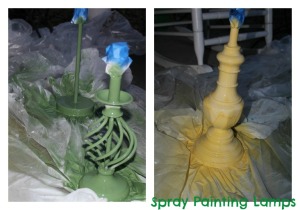
The colors of my bedroom are yellows and greens, so I wanted the lamps to coordinate accordingly. I bought this primer, along with this yellow spray paint and this green spray paint from home depot.

Here’s what you’ll need:

  • Spray Paint
  • Spray Paint Primer
  • Paint Tarp

Now, I made my first spray paint oppsie and I wanted to pass it along to you. Since I was only home for a few days, I was under a tight deadline to complete this project. Unfortunately, the two days I had time to work on the lamps it was rainy and because of this the air was super damp outside.  This caused the spray paint to take extra time to dry. The tall lamp I spray painted yellow even bubbled from the moisture when I sprayed the second coat on. So lesson of this story, don’t spray paint outside when the air is super damp.

spray paint lamp

So back to spray painting. I laid down a tarp and spray painted a layer of primer. I let the primer dry for about 6 hours (considering it was really damp), then spray painted the first layer of spray paint. I then let the first layer dry over night. The next morning I spray painted the second layer (this is when things when awry). I’ve spray painted things before and based on that experience, I definitely gave these lamps enough time to dry.  Darn you moist air!  How dare you throw off my DIY timelines!

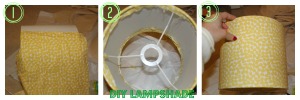
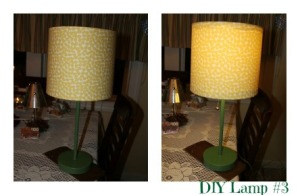
diy_lampshade

While I was waiting for the paint to dry,  I started working on the lamp shades. Another recommendation for you. The first time you try this project, start with a drum shaped lamp shade (pictured above). It is much easier to recover than recovering one of these. I did cover two others, one bell shaped  and another empire shaped but it was pretty difficult and although the shades turned out pretty good, I was much happier with the drum shade.

Second tip: pick a light fabric, like a cotton fabric, to cover your lamp shades. With a lighter fabric light can still shine through.

I’ll share my steps for the drum shade, as I kind of just winged it with the other two.

Supply List:

  • Hot glue gun
  • Scissors
  • Measuring tape
  • Fabric
  • Clothes Pins

Steps (sorry I don’t have more photos, like I said I was under a tight deadline):

  • First I measured the height of the lamp shade. I added 2 inches to the measurement. One inch for the top and one for the bottom.
  • I then measured the circumference of the lamp and added 2 inches.
  • Then I cut the fabric.
  • I first used a couple clothes pin to hold the fabric in place.  This helped to pull the fabric tightly. Make sure to align the seam of your fabric with the seam of the shade.
  • I then glued the fabric, using a hot glue gun, to the seam of the drum. Next I glued the fabric to the top and the bottom of the shade about 3 inches at a time, making sure to pull the fabric tight. Looking back it would have been helpful to have another set of hands to help with the pulling.
  • After gluing all the fabric onto the shade, I then went back and trimmed the excess fabric from inside the shade.
  • After I was finished with all of the shades, I ironed them to smooth out the fabric even more.

diy lampshade

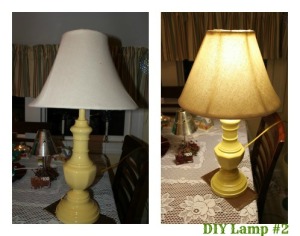
Here are the finished lamps! I still have some touching up I plan to do, like sanding the areas that bubbled and re-spraying them.  I plan to also glue some ribbon inside of the shade to cover up the fabric edge and to add a pop of fun.
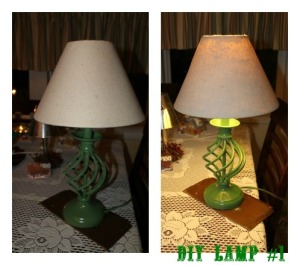
spray paint lamp

diy lamp

spray paint lamp

Here are my tips:

  • Don’t spray paint outside when it’s damp and rainy
  • For your first lamp shade project, start with a drum shaped shade
  • Buy light fabric to cover your shade
  • Recruit a second set of hands to help pull the fabric tight as you’re gluing it around the lamp shade
  • Buy ribbon to cover up the fabric edge

I know my blog post was lacking in picture steps so here are a couple posts that will help you on your revamping journey!

Leave a comment

Filed under DIY Projects

Chalk Paint Dining Room Table

dining room table

If you’re looped into the DIY phenomena then chances are, you’ve heard of this British dame, named Annie Sloan. She invented this paint, called chalk paint, that has literally splashed the DIY world. It’s claimed to be the premier paint to re-do old furniture.

So newly DIY obsessed me decided to give Annie Sloan’s invention a try. Now I have to warn, you do have to initially get over the sticker shock. Annie Sloan, oh my I wish I was you, is raking in about $40 a quart for paint! Yes a quart. And a teeny, weeny sample size is around $11. I bought my chalk paint from a store in my home town, Thrill of the Hunt, who I’ve mentioned a time or two. If you’re living in the Northern Virginia area, Stylish Patina, also sells the paint.

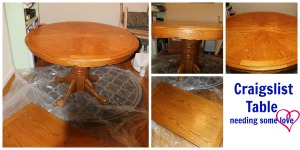
I decided to first paint our dining room table. It was a craigslist find that I originally bought (for $75) with the intention to paint. I chatted with the owners of of Thrill of the Hunt and they recommended the following supply list.

My supplies list:

  • one quart of  provence chalk paint
  • paint brush
  • paint tarp
  • wax
  • deglosser
  • rag for applying the wax
  • textured rag for buffing the wax
  • sand paper if you plan to give your item a rustic look ( I bought light and medium sand paper)

I strayed away from one item, the Annie Sloan Soft Wax. Again, the wax is pretty expensive at $27 for a 500 ml bucket. I instead bought this wax. Now, one recommendation I would make is to buy clear wax instead. This wax is a light brown color which worked fine for my table I planned to sand but for another table you might want clear wax instead. I found one clear wax at home depot here, you might want to give a try.

Time to get to work!

First I used this deglosser to take the gloss off the table. The owners at Thrill of the Hunt recommended this to help the paint bind to the surface. I just followed the directions, applying the deglosser to a rag and then rubbing it onto the wood.  I applied the deglosser three times, waiting around 15 minutes in between each coat.

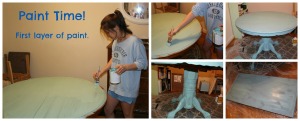
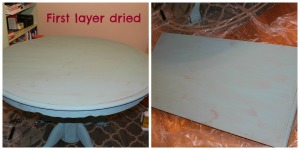
After the last coat dried it was paint time! I applied the first coat of paint, trying to make even strokes.  The paint was easy to apply and even with one coat the table already looked 1000 times better. I let the first coat dry over night.

A word of advice, make sure to close the can of paint tightly. Chalk paint will dry out quickly (or so I’ve heard).

painting table

first coat of annie sloan chalk paint

The next day I applied the second coat of paint and let it dry over night.

Did I mention you have to be a little patient with this kind of project? 🙂

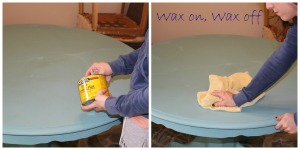
The third day, I applied the wax. I rubbed the wax in circles, then let it dry for an hour, and then buffed it with a textured cloth. The wax did create a very smooth surface and will help to protect the paint from damage over time.

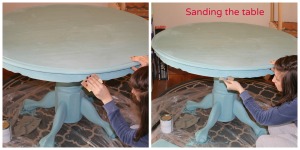
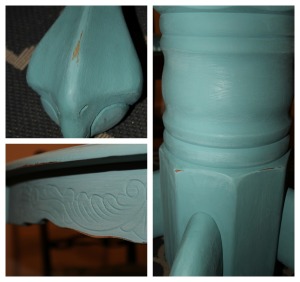
Last step wohooo! I wanted my table to still have a somewhat rustic look, so I sanded a few places to give it an older feel.

waxing painted table

sanding painted table

sanding the table

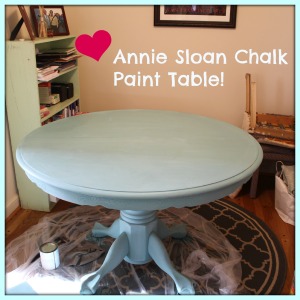
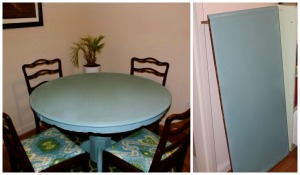
Here’s the finished table. I painted the leaf as well, so I can use it when we’re entertaining or when Brian and I, one day, have a bigger place.

annie sloan chalk paint table

chalk paint table

I love the table!!! It goes perfectly with our reupholstered chairs. Can’t wait to paint something else.  Painter for hire!

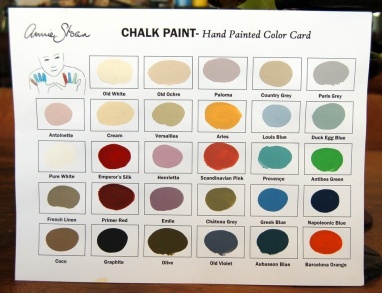
Here is the full list of all the chalk paint colors.

chalk paint guide

Also, if you’re interested in checking out another chalk paint, CeCe Caldwell is another.

Hope you get inspired to freshen up something of your own!

Join East Coast Creative’s link party here.

10 Comments

Filed under DIY Projects

DIY Christmas Ornament

I’m finally feeling like the holidays are winding down. I’m lucky that my work holiday party is actually after the holidays, so I get to draw out the Christmas cheer just a wee bit longer which I usually love!  This year though, with a lot on my plate at work and being the party planner of the event, I must say I’m happy for a break and ready for things to slow down.

I thought though, in case you’re missing the holidays, I would share a holiday DIY project.

This is a really simple DIY gift that anyone can make! In my family, it’s a Christmas tradition to exchange ornaments, and I always look forward to opening the ornaments from my mom. At this point, I’m sure I have well over 50 ornaments on my mom’s tree at home that will one day decorate my very own tree (when I don’t live in a small DC apartment).

This year, in true DIY fashion, I decided to semi-make an ornament. I bought these ornaments from Target (you can find really cheap ornaments after the holidays).

diy ornament

First, I snapped a holiday family photo on my fuji film instant camera (just love this camera!).

I then rolled the photo  tightly and stuffed it inside.  You can use a pencil to adjust the photo a bit.

Third, I played with my cat Bella (optional step)! diy ornament

Then I tied a bow on top! This was easy-peasy and my mom loved the homemade gift.

diy ornament 2012

Here are some other diy photo ornaments I’m digging. Maybe, I’ll try one of these next year!

Leave a comment

Filed under DIY Projects

New Year, New You

happy 2013It’s a new year and with that brings some time for reflection. 2012 was a growing year for me and I plan to continue that same growth in 2013.  I believe every person has the opportunity to be their best and sometimes it just takes a moment to recognize what you like about yourself and what you would like to improve upon. Then taking that improvement list and  figuring out ways to make small changes  to yourself that eventually turn into bigger changes.  By putting a plan into place and  taking small bites out of your big goal helps your new years resolutions more manageable.

So in 2013 I plan to work on…

Being in the moment. I often plan and plan. Even while,  for example,  working on a diy project I’m thinking about all the other things I’d like to do to our apartment instead of having fun and really enjoying that diy project. I find myself doing this in other aspects of my life, like when talking a friend, I’m thinking about all the other things I need to do.  Multi-tasking isn’t always the answer!  So in 2013, I plan to be fully present in whatever I’m doing.

Being more patient. Man oh man I’ve come to realize I’m pretty darn impatient. So in 2013, I plan to work on having realistic expectations for both myself and others.

Being more forgiving and accepting.  We all make mistakes and I’m pretty hard on myself and others on this one. It’s time to move on and not let the past hold me back. I’ve made many mistakes in my life, but it’s time to work hard not to repeat them and not beat myself up about them constantly.

Trying to stay positive. It’s funny how thinking one negative thought can easily cascade into more negative thoughts. Instead of seeing the sunny side, you see the dark side and expect the worst.  One bad thing happens and suddenly your whole day is ruined. I plan to work on staying positive and expecting the best,  not the worst.

Figuring out ways to manage my stress. I know I wouldn’t be happy if I wasn’t busy, but sometimes I pile too much on and get pretty darn stressed out and overwhelmed. I plan to work on realizing some things can wait until tomorrow and finding more ways to relieve my stress in that moment.

Some concrete goals I plan to accomplish in 2013…

  • Finish organizing and DIYing our apartment by the time our lease is up 🙂
  • Take a sewing class and sew one simple project like a pillow case or curtains.
  • Take a yoga class at least once a week. I always feel so great after and it certainly helps my legs for running. It helps with stress too!
  • Practice fiddling more. Maybe even playing in front of someone besides Brian and my mom!
  • Walk a 5 k with my mom!
  • Set a PR in the Cherry Blossom 10 miler and in the Monument 10 k in April.
  • Save more moola! Sometimes I want to do everything and saving money just isn’t as fun.  I would love to save more money this year!
  • Look at grad school programs and study for the GREs (and hopefully take them in 2013)!

Happy new year everyone! Hope you can accomplish big things in 2013!

6 Comments

Filed under Washington D.C.